
Lighting is the single variable that separates a product photo that drives sales from one that gets scrolled past. 75% of online buyers say product photos heavily influence their purchase decisions, which means the quality of your light is a direct business concern, not just an aesthetic choice. The challenge most photographers face is not a lack of information but too much of it, with options ranging from a single LED panel to elaborate multi-light studio rigs. This article walks through concrete product photography lighting setups examples across skill levels, product types, and budgets, so you can make an informed decision about what actually belongs in your workspace.
Table of Contents
- Key takeaways
- Key criteria for choosing product photography lighting setups
- 1. Single LED light with a reflector
- 2. Two-light LED softbox setup for e-commerce
- 3. Lightbox setup for small and reflective products
- 4. Multi-light setup with modifiers for texture and drama
- 5. Natural light setup for lifestyle and food products
- 6. Comparing setups: which one fits your work
- My honest take on product lighting after 30 years
- Take your product photography to a professional level
- FAQ
Key takeaways
| Point | Details |
|---|---|
| Light quality beats light quantity | A single key light with a reflector often produces cleaner results than multiple poorly placed lights. |
| CRI matters for color accuracy | Use light sources rated CRI 95 or above to reduce time spent correcting color in post-processing. |
| Shadows build buyer trust | Realistic shadows communicate product weight, texture, and scale to online shoppers. |
| Match setup complexity to product type | Reflective and small items suit lightboxes; textured or large products need controlled multi-light setups. |
| Budget and workspace shape your options | Entry-level setups start around $30, while professional two-light LED rigs run $80 to $300. |
Key criteria for choosing product photography lighting setups
Before you look at any specific lighting examples for product shoots, you need a framework for evaluating whether a setup actually fits your situation. The wrong setup creates more problems in post-processing than it solves on set.
Light source type
Your three main options are natural light, continuous LED, and flash or strobe. Natural light from large north-facing windows gives soft, diffused output that works well for cosmetics, food, and lifestyle shots. It costs nothing but cannot be fully controlled. Continuous LED lights are compact, quiet, and let you see exactly how light falls on your product before you shoot. LED continuous lights with CRI 95+ are color-accurate enough to reduce editing time significantly. Strobe lights offer more power and faster recycle times, but the learning curve is steeper and the cost higher.
Color rendering index
Lighting with a CRI below 80 introduces color shifts that force extra correction in editing. For product photography where a brand's exact red or the precise tone of a leather surface matters, aim for CRI 95 or above. This single specification eliminates one of the most common sources of wasted editing time.
Product characteristics to consider
- Size: Small objects need less space and can use compact setups like lightboxes. Large products require more powerful lights and a larger spread.
- Reflectivity: Highly reflective surfaces like watches and glassware require diffused, wraparound light to avoid harsh specular highlights.
- Texture: Matte, textured surfaces benefit from directional light that grazes across the surface and reveals detail.
- Color: Dark products absorb light and need more output or rim lighting to show definition.
Budget and workspace constraints
Entry-level lightboxes start at $30, while a professional two-light LED setup runs $80 to $300. Beyond gear cost, consider how much space you have. A two-softbox rig needs at least an 8x10 foot area to work comfortably.
Pro Tip: Before purchasing any gear, photograph your most difficult product type with whatever you already have. The problems that show up in those test shots tell you exactly what capability to buy next.
1. Single LED light with a reflector
This is where most photographers should start, and frankly, where many professional photographers spend most of their time. A key light at a 45-degree angle positioned slightly above and to one side of the product, paired with a white foam board reflector on the opposite side, is one of the most effective affordable lighting options for photography at any level.
The key light does the work of creating shape and dimension. The reflector bounces some of that light back into the shadow side, softening it without eliminating it entirely. That shadow is what gives the product a sense of volume. Flat, shadowless images read as two-dimensional, and buyers notice this even if they cannot articulate why.
- Best for: Candles, skincare bottles, small packaged goods, books, and medium-sized objects with moderate reflectivity
- Gear needed: One LED panel or LED softbox, one white foam core board (under $5 at any art supply store)
- Cost range: $40 to $150 depending on the LED fixture
- Learning curve: Low. Most photographers get repeatable, professional results within one practice session.
- Limitation: Uneven backgrounds and hot spots on shiny surfaces require repositioning rather than adding gear.
Pro Tip: Attach a small piece of black foam board to the back of your reflector. Flip it to the black side when you want to deepen shadows on a dark product instead of filling them.
2. Two-light LED softbox setup for e-commerce
The two-light softbox setup is the workhorse of e-commerce photography. It produces even, controlled illumination with predictable shadow behavior, which is exactly what catalog work demands. This is one of the most widely used studio lighting setups for products at the commercial level because it scales well and delivers consistent results across a full shoot day.
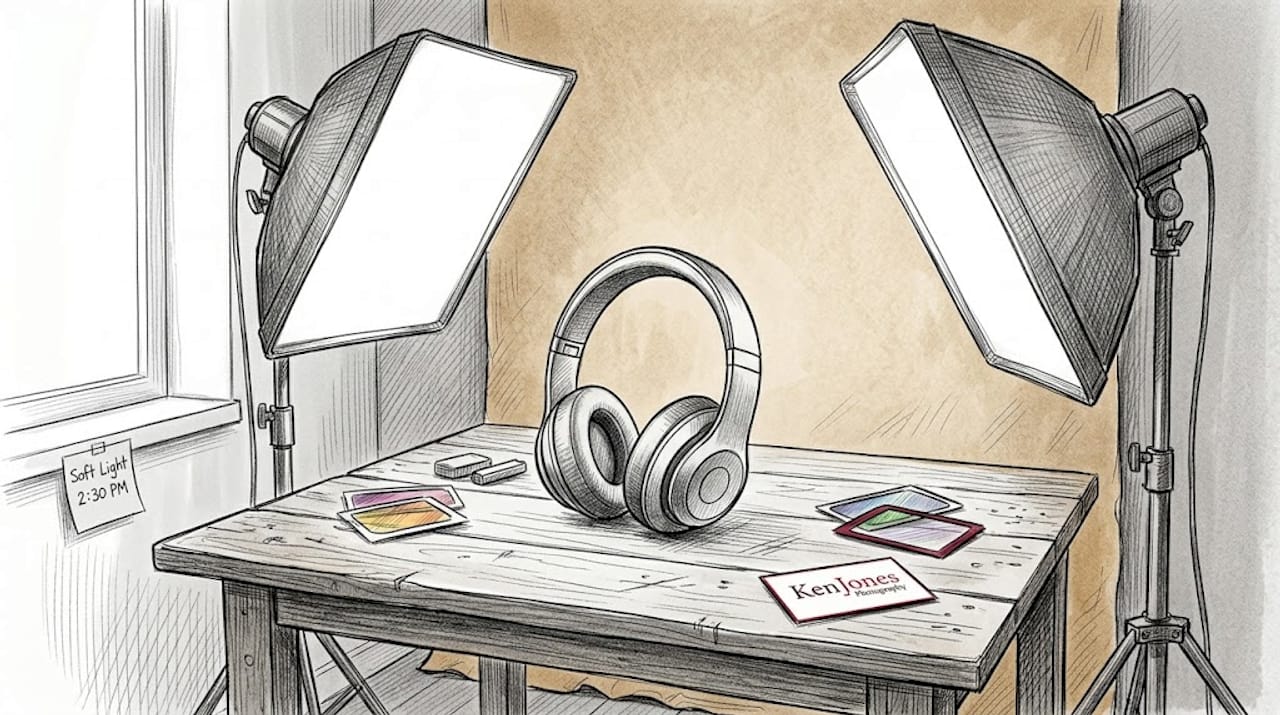
The configuration places a key light softbox at roughly 45 degrees to one side and slightly above the product. A fill light softbox sits at 45 degrees on the opposite side, set at roughly half the output of the key light. This ratio creates enough shadow depth to show dimension without the harsh contrast that makes products look aggressive or difficult to read.
Here is a step-by-step approach for setting up this configuration:
- Place your product on a white seamless or acrylic surface.
- Position your key light at 45 degrees to camera left, slightly above product height.
- Set your fill light at 45 degrees to camera right, at the same height.
- Set fill light power to 50% of the key light output.
- Test shoot and check for unwanted shadows behind the product on the background.
- Add a third light aimed at the background if shadows need to be eliminated for a pure white result.
- Use a light meter or your camera's histogram to confirm the background exposure hits pure white without overexposing the product.
| Feature | Two-light softbox setup | Single light with reflector |
|---|---|---|
| Cost | $80 to $300 | $40 to $150 |
| Shadow control | High | Moderate |
| Background cleanliness | Excellent | Good |
| Setup time | 15 to 25 minutes | 5 to 10 minutes |
| Best for | E-commerce, catalogs | Single product shots, lifestyle |
| Post-processing burden | Low | Low to moderate |
The precise placement of backlights and flags can further refine this setup. A flag, which is simply a black card placed to block stray light, prevents unwanted spill on the background and keeps the product isolated cleanly. For photographers shooting consistent e-commerce product imagery, this two-light configuration is the baseline worth mastering before moving to anything more complex.
3. Lightbox setup for small and reflective products
A lightbox, sometimes called a light tent, is a collapsible box with translucent white panels and built-in LED strips or space for external lights. The panels act as giant diffusers, wrapping light around the product from multiple directions simultaneously. The result is soft, even illumination with minimal shadows and a clean white background.
For photographers working with jewelry, watches, electronics, and small cosmetics, lightboxes solve a real problem. Reflective surfaces pick up every environmental object in the room, and controlling those reflections in a standard studio setup is technically demanding. The lightbox wraps the product in a neutral white environment, eliminating most unwanted reflections without requiring advanced modifier skills.
- Best for: Jewelry, watches, small electronics, sunglasses, and any object under 12 inches
- Cost range: $30 to $150 for complete kits with built-in LED strips
- DIY option: Build one with a cardboard box, white tissue paper over the open sides, and two desk lamps
Small catalog shoots using lightboxes take 20 to 35 minutes per product when you include shooting and basic post-processing, making them time-efficient for batches of 10 to 50 items.
The drawbacks are real and worth knowing before you commit. Lightboxes produce flat lighting that lacks depth and dimensionality. This is the trade-off you accept for the speed and consistency they offer. Buyers can often sense when a product looks "cut out" rather than photographed with intention, especially in higher-end categories where brand perception matters.
| Lightbox size | Max product size | Approximate cost |
|---|---|---|
| 12 x 12 inches | Small accessories | $30 to $60 |
| 20 x 20 inches | Shoes, bags | $60 to $100 |
| 30 x 30 inches | Clothing folded, small tools | $100 to $150 |
Pro Tip: Add a single external LED panel aimed through one side of the lightbox at a slightly stronger intensity than the built-in strips. This creates a gentle directional quality to the light that prevents the flat look without losing the clean background.
4. Multi-light setup with modifiers for texture and drama
This is where lighting becomes a creative act rather than a technical checklist. Multi-light setups with modifiers give you the ability to sculpt a product the way a sculptor uses shadow and light to reveal form. These setups are used in high-end brand campaigns, luxury product catalogs, and any situation where the image needs to do more than simply document what a product looks like.
A professional multi-light setup typically includes four to five light sources, each with a specific role:
- Key light: The primary source, usually a large softbox or beauty dish, positioned to create the main shape and highlight of the product
- Fill light: A smaller source or reflector that controls shadow density without eliminating depth
- Backlight or rim light: Positioned behind and slightly to the side of the product to create edge separation, making the product stand out from the background
- Background light: Aimed at the backdrop separately to control its tone independently from the product exposure
- Accent light: A small, focused source like a gridded snoot used to highlight a specific detail, such as a logo, texture, or material quality
Realistic shadows from controlled lighting give buyers sensory information about product weight, texture, and scale. A leather shoe photographed with a sidelight that grazes across its surface reads entirely differently from the same shoe in a lightbox. The texture tells a story that justifies the price.
Modifiers matter as much as the lights themselves. Softboxes spread and soften. Grids narrow the beam angle of any modifier and prevent spill. Diffusion panels reduce contrast. Flags block light from areas where it is not wanted. Combining these tools with precision requires practice, but the results are what separate commercial-grade imagery from competent documentation.
Pro Tip: When lighting a textured product, close one eye and look at the set from camera position before shooting. This removes the depth perception advantage your brain normally uses and shows you exactly what the camera will record. Adjust until the texture reads clearly from that single-eye view.
This level of setup does require space. A full multi-light product rig comfortably needs a studio footprint of at least 15x15 feet to position lights without causing unwanted cross-contamination between sources. For photographers considering this investment, focus stacking combined with multi-light setups produces exceptional sharpness across small, detailed products like jewelry, far beyond what a single exposure can achieve.
5. Natural light setup for lifestyle and food products
Natural light is an underused resource for photographers who assume it lacks the control of studio setups. Used correctly, it delivers a quality that is genuinely difficult to replicate artificially, particularly for organic, food, beauty, and lifestyle products where warmth and authenticity matter. You can see strong lifestyle studio lighting examples that demonstrate how directional natural light shapes product context and mood.
The setup is straightforward. Position your product near a large north-facing window, where light is indirect and consistent throughout the day. North-facing light does not shift in color temperature the way east or west exposure does, which makes it far more reliable for matching shots taken hours apart.
Use white foam board on the shadow side to bounce light back and control shadow density. A sheer white curtain or diffusion film over the window reduces contrast on bright days. A black card on the opposite side deepens shadows for dramatic, moody food or beverage shots.
The limitations are real. You cannot shoot at night, and overcast days change the light character. For high-volume commercial work, natural light alone is not reliable enough to maintain consistency across a long catalog shoot. But for a boutique brand, a small-batch product launch, or a lifestyle image that needs to feel warm and genuine, it is the right tool.
6. Comparing setups: which one fits your work
Choosing among these setups comes down to four factors: product type, output volume, budget, and the visual language your brand or client requires.
| Setup | Cost range | Best product type | Shadow control | Post-processing time |
|---|---|---|---|---|
| Single light with reflector | $40 to $150 | Packaged goods, candles, books | Moderate | Low to moderate |
| Two-light LED softbox | $80 to $300 | E-commerce, catalog, apparel | High | Low |
| Lightbox | $30 to $150 | Jewelry, watches, small electronics | Very low | Very low |
| Multi-light with modifiers | $300 to $2,000+ | Luxury, textured, large products | Precise | Low if lit well |
| Natural light | $0 to $20 | Food, lifestyle, cosmetics | Moderate | Moderate |
Portability is worth considering as well. Lightboxes collapse and travel easily, making them workable for photographers who shoot on location at client warehouses or showrooms. A full multi-light rig is studio-bound by nature. The two-light softbox setup sits in the middle, portable enough for location work with some planning.
Scalability is the other consideration. Start with the single-light setup, add a second light when the fill side looks consistently underexposed, then add a background light when white backgrounds are coming out gray. This progression builds understanding of each light's contribution before you add the next variable.
For photographers thinking about how to light product photography as a sustainable service offering, how you position your photography work online matters as much as the quality of your images. Understanding SEO for photographers can help translate technical lighting skill into a client base that finds you.
My honest take on product lighting after 30 years
In my experience, the photographers who produce the most consistent, trust-building product images are not the ones with the most gear. They are the ones who learned one setup deeply before moving to the next. I have watched photographers spend $2,000 on a full strobe kit and still produce images that look uncertain because they do not yet understand how each light interacts with the next.
The lightbox conversation is one I keep coming back to. Clients ask about lightboxes because they are affordable and fast. I do not dismiss them. For small accessories in volume, they work. But when I see a luxury leather bag or a premium skincare line photographed in a lightbox, something gets lost. The product looks like a catalog cutout rather than an object worth owning. That flatness undermines the brand positioning before the buyer even reads the product description.
What I have found actually works is starting with a single LED softbox, learning to read the shadow it creates, and using that shadow intentionally rather than eliminating it. Shadows are information. They tell the viewer what the product is made of, how heavy it is, and whether it deserves their trust. That is not a minor aesthetic point. It is the difference between a photo that creates desire and one that simply documents.
My advice for photographers building a product photography practice: invest in your first setup completely before adding to it. By "completely," I mean learn it well enough that you can replicate your best results in under ten minutes. That kind of control is what lets you serve clients at a commercial pace. Gear does not replace that understanding. It adds to it, but only once the foundation is solid.
— Ken
Take your product photography to a professional level
When your product lighting needs to be flawless and repeatable, working in a properly equipped studio removes every variable that holds you back. Kenjonesnyc operates a full-service Manhattan studio rental in the Financial District, designed for exactly this kind of high-stakes commercial work. The space is equipped for professional product, fashion, and editorial shoots, with the technical infrastructure and expertise that serious brands require.
Whether you are building your own product photography portfolio or producing imagery for a client campaign, Kenjonesnyc's product photography services bring 30 years of commercial expertise to every session. Explore the luxury editorial work that demonstrates what professional lighting, direction, and execution look like at the highest level, and reach out to discuss how the studio can support your next project.
FAQ
What is the best single lighting setup for beginners?
A single LED softbox at a 45-degree angle with a white foam board reflector on the opposite side is the most reliable starting point. It produces professional-looking images with minimal gear and a low learning curve.
Do lightboxes work for all product types?
Lightboxes work well for small reflective objects like jewelry and watches but produce flat lighting that lacks depth. They are not suitable for textured products, large items, or imagery where dimensional quality and brand premium matter.
How much does a basic product photography lighting setup cost?
Entry-level lightboxes start at $30, while a two-light LED softbox setup runs between $80 and $300. A professional multi-light studio rig can cost $300 to $2,000 or more depending on the fixtures and modifiers selected.
Why does CRI matter for product photography lights?
Lights with CRI below 80 cause color shifts that require more editing time and risk inaccurate product color representation. CRI 95 or above delivers accurate color rendition straight from the camera.
How do shadows improve product photos?
Realistic shadows communicate product weight, texture, and scale to the viewer, building credibility and purchase confidence. Completely shadowless images often read as flat and unconvincing, particularly for premium product categories.
Recommended
- Ken Jones Photography | NYC Fashion, Beauty & Commercial Photographer | Manhattan Studio Rental - Luxury Product & E-Commerce Photography
- Ken Jones Photography | NYC Fashion, Beauty & Commercial Photographer | Manhattan Studio Rental - Noirion Fashion Lookbook | Studio Lighting Study
- Ken Jones Photography | NYC Fashion, Beauty & Commercial Photographer | Manhattan Studio Rental - Studio Fashion Lookbook with Projected Window Light
- Ken Jones Photography | NYC Fashion, Beauty & Commercial Photographer | Manhattan Studio Rental - Advertising Campaign Photography