Studio lighting is one of the most technically demanding and creatively rewarding skills a photographer can develop. With so many examples of studio lighting configurations available, knowing where to start and which setup actually fits your project can feel paralyzing. This article cuts through the noise by walking you through the most practical, repeatable configurations used by working photographers, from a single-light setup with a reflector to a full three-point portrait arrangement. You will learn how key lights, fill lights, modifiers, and lighting ratios interact, and how to evaluate studio lighting setups with confidence.
Table of Contents
- Key takeaways
- 1. Examples of studio lighting configurations: the single-light setup
- 2. Two-light setup: key and fill with controlled ratios
- 3. Classic three-point lighting: the professional portrait standard
- 4. Portrait lighting patterns: butterfly, loop, Rembrandt, and split
- 5. How to evaluate studio lighting setups: ratios, modifiers, and space
- My take on mastering studio lighting configurations
- Explore professional studio lighting in action
- FAQ
Key takeaways
| Point | Details |
|---|---|
| Start with one light | A single key light with a reflector fill teaches core lighting principles without overwhelming complexity. |
| Ratios control mood | Lighting ratios from 1:1 to 9:1 determine shadow depth and emotional tone in any portrait. |
| Pattern follows angle | Moving your key light just 5 to 10 degrees shifts the entire shadow geometry and portrait mood. |
| Modifiers shape quality | Softbox size, shape, and feathering technique determine how hard or soft your light feels on skin. |
| Build setups gradually | Adding lights one at a time lets you understand each light's role before increasing complexity. |
1. Examples of studio lighting configurations: the single-light setup
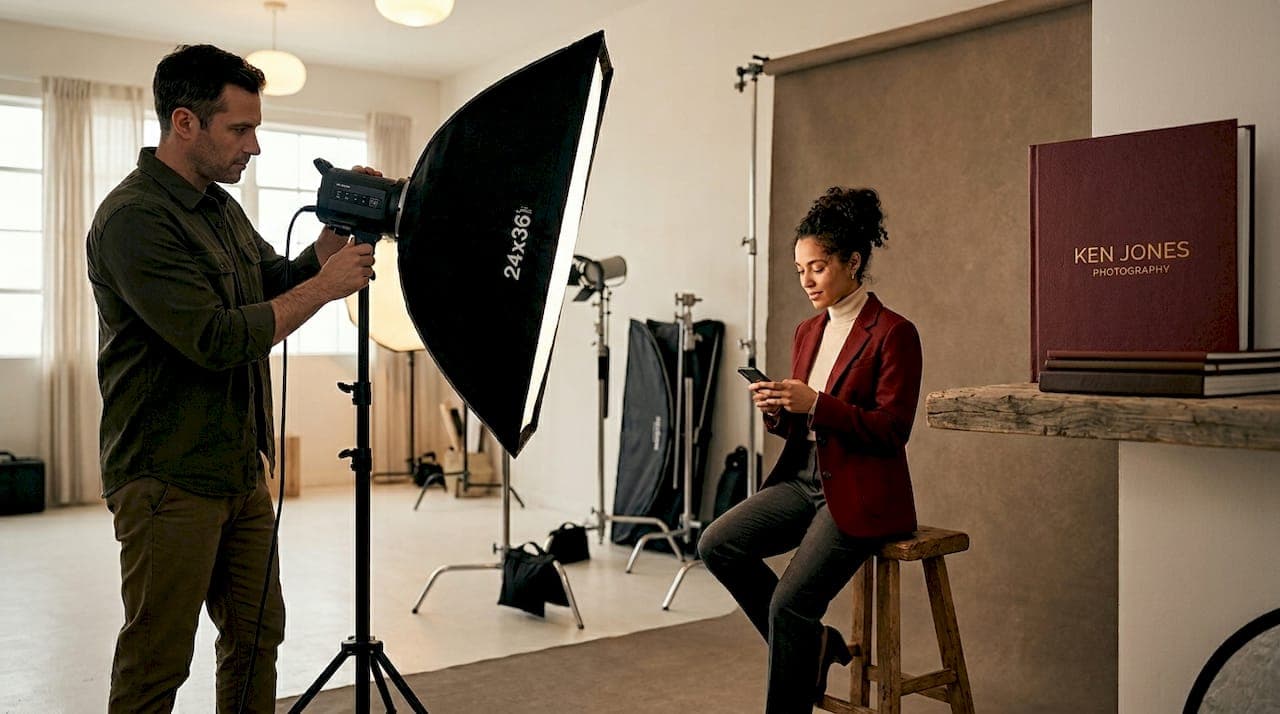
The single-light configuration is the best starting point for any photographer learning to configure studio lighting. It forces you to understand what one well-placed light source actually does before adding complexity.
The setup is straightforward. Place a strobe or speedlight fitted with a 24x36 inch softbox at 30 to 45 degrees from the subject, slightly above eye level and roughly 3 to 4 feet away. That angle and height create natural shadow fall-off that shapes the face without going dramatic. On the opposite side, position a white reflector or a piece of foam board to bounce light back into the shadows. You get fill without a second power source.
The advantages here are real. This setup is affordable, portable, and produces clean, dimensional portraits that hold up in commercial and editorial contexts. Many working photographers use this exact configuration for quick editorial turnarounds and environmental headshots.
Pro Tip: If your strobe has a modeling light, turn it on and walk around the subject before you fire a single frame. Modeling lights preview shadows and highlights in real time, saving you from guessing during the actual shoot.
2. Two-light setup: key and fill with controlled ratios
Once you understand what a single key light does, adding a dedicated fill light opens up precise control over contrast. This is where lighting ratios become your primary creative tool.
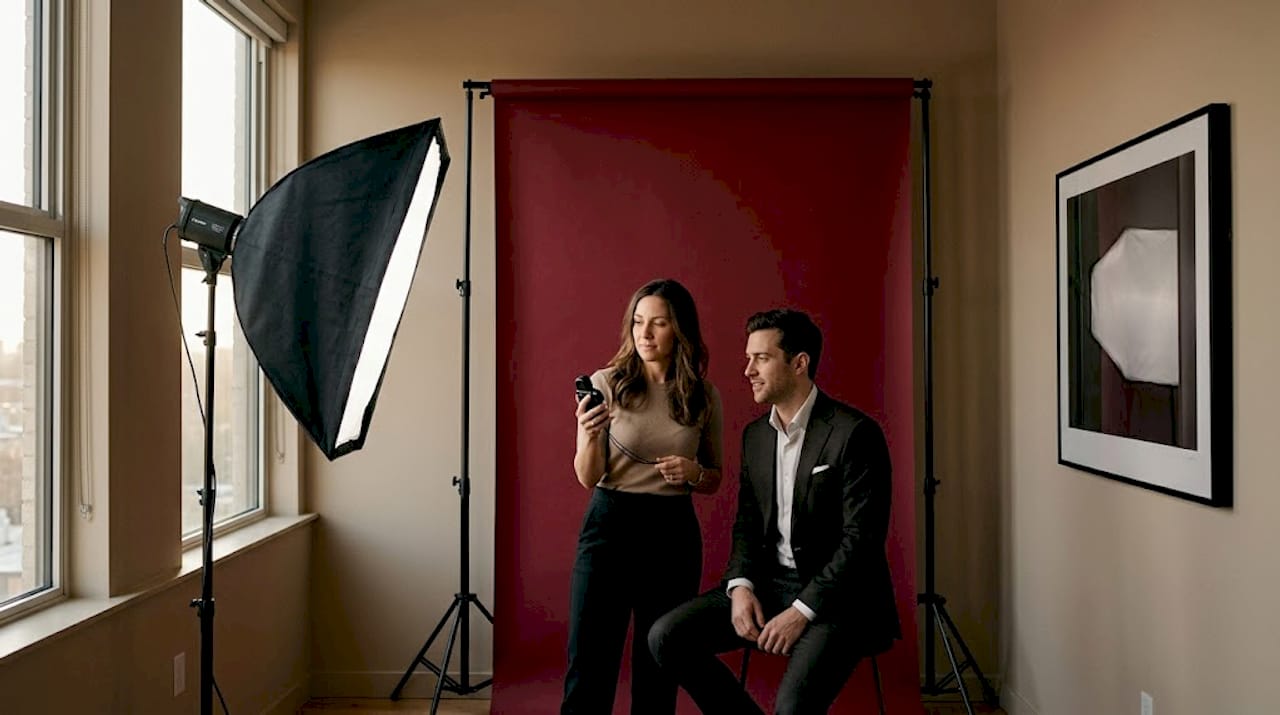
Position your key light the same way as the single-light setup: 30 to 45 degrees off-axis, slightly above eye level. Place the fill light on the opposite side of the subject, at the same distance but set 1 to 2 stops lower than the key. That difference creates a 3:1 lighting ratio, which is the most common choice for professional portrait work because it retains dimension while keeping shadow areas readable.
Here is what each stop difference actually means in practice:
- 1:1 ratio (0 stops difference): Flat, even light with no shadow. Useful for certain beauty and product work, but rarely flattering for portraits.
- 3:1 ratio (1 stop difference): Natural shadow with visible detail. The standard for corporate headshots and editorial portraits.
- 5:1 ratio (2 stops difference): Stronger contrast, more dramatic mood. Good for fashion or character-driven editorial work.
- 9:1 ratio (3 stops difference): Deep, cinematic shadows. Used intentionally for high-contrast artistic portraits.
The fill light must have a defined role or it will work against you. As Harlowe's studio lighting research confirms, a fill that is too bright flattens the image and strips out the dimension you worked to create with the key.
Pro Tip: Use a handheld incident light meter rather than relying on your camera's histogram to set ratios. Precise ratio measurement eliminates guesswork and gives you repeatable results across sessions.
3. Classic three-point lighting: the professional portrait standard
Three-point lighting is the most widely used configuration in professional portrait photography, and for good reason. It creates separation, depth, and polish that two-light setups simply cannot match.
The three lights each serve a specific purpose:
- Key light: Placed at 30 to 45 degrees with a softbox or beauty dish, this is your primary light source and defines the overall mood.
- Hair or rim light: Positioned behind and above the subject, fitted with a grid or snoot to control spill. This light separates the subject from the background and adds a professional finish.
- Background light: Aimed at the backdrop to control its tone independently from the subject. A lighter background reads as clean and commercial; a darker one reads as moody and editorial.
A reflector can handle fill duties in this configuration, or you can add a fourth light for more precise fill control. The comparison below shows how each variant affects the final image:
| Configuration | Fill source | Background control | Best use case |
|---|---|---|---|
| 3-point with reflector | White reflector | Background light | Portraits, headshots |
| 3-point with fill light | Dedicated fill strobe | Background light | Fashion, beauty editorial |
| 4-point full setup | Dedicated fill strobe | Separate background light | High-end commercial work |
Classic three-point lighting gives you independent control over every zone of the image: the subject's face, the subject's outline, and the background. That independence is what separates polished commercial work from amateur results. You can see this separation at work in Kenjonesnyc's corporate portrait sessions, where precise background and rim lighting define the studio's signature look.
4. Portrait lighting patterns: butterfly, loop, Rembrandt, and split
Lighting patterns are not separate setups. They are positions of a single key light relative to the subject's face. Understanding them gives you a vocabulary for describing and reproducing specific looks.
| Pattern | Key light position | Shadow characteristic | Typical use |
|---|---|---|---|
| Butterfly (Paramount) | Centered, directly above | Symmetrical shadow under nose | Beauty, glamour, fashion |
| Loop | 30 to 45 degrees, slightly above | Small loop shadow beside nose | Portraits, headshots |
| Rembrandt | 45 to 60 degrees, above eye level | Triangle of light on shadow cheek | Dramatic, character portraits |
| Split | 90 degrees to subject | Half face lit, half in shadow | Artistic, high-contrast editorial |
The key insight here is that small angle adjustments of 5 to 10 degrees can shift you from one pattern to another. Loop and Rembrandt are neighbors. Rembrandt and split are close. You do not need to move your entire setup to change the mood of a portrait.
Watch the nose shadow as your feedback mechanism. Portrait lighting patterns can be dialed in by pivoting a single key light and observing how the shadow cast by the nose changes shape and direction. A shadow that drops straight down indicates butterfly. A small loop beside the nostril is loop lighting. A triangle of light on the darker cheek is Rembrandt.
Modifier recommendations by pattern:
- Butterfly: Beauty dish or large softbox directly overhead for smooth, flattering skin texture.
- Loop: Medium softbox at 30 to 45 degrees for soft, commercial-grade results.
- Rembrandt: Smaller softbox or reflector to preserve shadow contrast and edge definition.
- Split: Hard light source or gridded strobe for clean, defined shadow lines.
The fashion lookbook work at Kenjonesnyc's studio lighting studies demonstrates how these four patterns shift the entire emotional register of an image while using the same subject and location.
5. How to evaluate studio lighting setups: ratios, modifiers, and space
Knowing the configurations is only half the work. Choosing the right one for a specific project requires evaluating several practical factors before you fire a single frame.
Lighting ratios and mood. Lighting ratios from 1:1 to 9:1 control how dramatic or natural your image reads. Higher ratios create deeper shadows and a more intense mood. Lower ratios produce even, accessible light suited to corporate and beauty work. Match the ratio to the emotional tone your client needs.
Modifier size and light quality. Larger modifiers produce softer light with gradual shadow edges. Smaller modifiers produce harder light with defined edges. Medium rectangular softboxes are often a better choice for smaller studios because they feather more easily and reduce unwanted spill onto walls and backgrounds.
Space constraints. A large octabox needs room to breathe. In a tight studio, feathering a rectangular softbox gives you more control over where the light falls. Measure your space before committing to a modifier.
Defining each light's role. Before adding a second or third light, ask what specific problem it solves. Is it filling shadows? Separating the subject from the background? Lighting the backdrop independently? Each light needs a defined role or it creates competing shadows and a muddier image.
Pro Tip: Build your setup one light at a time. Fire the key light alone first, evaluate the shadows, then add fill. Evaluate again before adding a rim or background light. This process teaches you what each light actually contributes.
My take on mastering studio lighting configurations
After more than 30 years shooting fashion, beauty, and commercial work in New York, I have one consistent observation: photographers who struggle with lighting are almost always trying to solve the wrong problem. They add more lights when the real issue is that their single key light is in the wrong position.
I have seen photographers spend hours adjusting a three-light setup when a five-degree shift in the key light would have fixed everything. Subtle angle adjustments are more powerful than most people realize, and they cost nothing.
My honest advice: start with one light and a reflector. Shoot 50 portraits with that configuration. Learn what happens when you move the light closer, farther, higher, lower, and to the side. Then add a fill light and repeat. You will understand lighting ratios in your hands before you ever read a chart about them.
The photographers who produce consistently strong work are not the ones with the most gear. They are the ones who understand what each light is doing and why. A well-metered single key light will outperform a poorly configured five-light setup every time.
— Ken
Explore professional studio lighting in action
If you want to see these lighting configurations applied to real commercial and editorial work, Kenjonesnyc offers a full range of photography services and studio rental out of Manhattan's Financial District. With over 30 years of high-end fashion, beauty, and corporate work, the studio's portfolio demonstrates every configuration covered in this article, from clean corporate loop lighting to dramatic Rembrandt setups for editorial fashion.
Browse the advertising campaign portfolio to see how professional lighting setups translate to commercial results, or explore the Manhattan studio rental options if you want to work in a fully equipped space with expert support available. Whether you are booking a full production or renting the studio for your own shoot, the lighting infrastructure and guidance are there when you need them.
FAQ
What does a studio lighting setup include?
A studio lighting setup typically includes a key light, a fill source (either a reflector or a second strobe), light modifiers such as softboxes or beauty dishes, and stands. More advanced setups add a rim or hair light and a background light for full control over every zone of the image.
What is the most common lighting ratio for portraits?
A 3:1 ratio, where the fill light is set one stop below the key light, is the standard for professional portrait work. It creates natural shadow depth while keeping the shadow side of the face readable and dimensional.
How do I know which portrait lighting pattern to use?
Match the pattern to the mood and purpose of the image. Butterfly lighting suits beauty and glamour work. Loop lighting is the most versatile choice for headshots and editorial portraits. Rembrandt and split lighting work best for dramatic, character-driven images.
How many lights do I need for a professional studio setup?
You can produce professional-quality portraits with as few as one light and a reflector. Three lights give you independent control over the subject, the subject's outline, and the background, which is the standard for commercial and editorial work.
What is the best modifier for a small studio?
A medium rectangular softbox is often the most practical choice for smaller spaces. It feathers more easily than an octabox, reduces light spill onto walls, and gives you precise control over where the light falls on your subject.
Recommended
- Ken Jones Photography | NYC Fashion, Beauty & Commercial Photographer | Manhattan Studio Rental - Noirion Fashion Lookbook | Studio Lighting Study
- Ken Jones Photography | NYC Fashion, Beauty & Commercial Photographer | Manhattan Studio Rental - Light & Form
- Ken Jones Photography | NYC Fashion, Beauty & Commercial Photographer | Manhattan Studio Rental - Studio Fashion Lookbook with Projected Window Light
- Ken Jones Photography | NYC Fashion, Beauty & Commercial Photographer | Manhattan Studio Rental - White-on-White Fashion Lighting Study